Motivation and Background
This one has been on my TODO list for about two years and it feel good to finally get it done! The original motivation was the CS6747 Advanced Topics in Malware Analysis course at Georgia Tech. It uses Ghidra for the static analysis reverse engineering (RE) portion of the course and later some plugin development. It turns out that to work on Ghidra projects on different systems or collaboratively you need to host the project files on a Ghidra server instance. Being new to Ghidra and RE in general I was unaware. I travel a decent amount for work so I wanted to be able to bounce between my home desktop with more screen real estate and my laptop when I'm away. I thought a good way to move my Ghidra project back and forth between systems like I typically do with a private github repo. I created the project on one system, initialied the repo, and git push-ed it. Moving over to the other system I git pull-ed it and got this:

Yike! Ghidra's Archive Current Project and Restore Project feature could effectively achieve this but that is not its intent and would result in a clunky implementation for active RE work. However the intended, and dare I say, proper option is to run a Ghidra server instance. It automatically handles things like your commit history and merge conflicts as well as individual user accounts.
The Ghidra Book - The Definitive Guide by Chris Eagle and Kara Nance from No Starch Press was my resource for the project. Specifically Chapter 11 called Collaborative SRE with Ghidra (note: SRE stands for software reverse engineering). The code is publicly available from the authors' book website and the specific script is called installGhidraServer.sh. A couple things were slightly outdated and I added some basic error checking for the bash script input. Also one important option didn't existed when the book was published and had since been added by the Ghidra developers. My redition of the instllation script is on my github. Please note that I've publicly published this code as it's freely available from the authors and full credit should still be attributed to authors Eagle and Nance along with their original copyright and licensing agreement.
With those details out of the way, installing Ghidra directly to Ubuntu server was relative simple with the code and guidance from The Ghidra Book. This is assuming you are comfortable with some Linux basics and can launch your own cloud VM.
Installation Steps
1. Provision a cloud VM using your favorite Virtual Private Server (VPS) provider with Ubuntu server (I only tested 20.04 but a newer version would likely be fine too using Java 17). I'm not advocating for/against any specific option but Digital Ocean's cheapest VM is $6/month. Many cloud providers give a free credit if you're a new customer too. I had some free Azure credits so that's what I used.
2. Take note of the assigned VM's public facing static IP address as you'll need it later. The VM likely has a private RFC 1918 IP address assigned. If it's directly assigned the a publicly routable IP then you probably can ignore this step but I wasn't able to test it in the cloud, only locally. I don't believe this option existed at the time of publishing of The Ghidra Book and is something I got stuck on for a while. I could get a Ghidra server instance working locally but I couldn't connect in the cloud. I finally read the documentation and found some old posts about the -ip option.
3. Ensure ports TCP 13100, 13101, and 13102 inbound are open for the VM. Similarly, if you have a firewall at home allow those same ports outbound.
4. If you manage VM access using SSH, choosing certificate authentication is highly recommended (open port TCP 22 for this). There's always an increased risk running an internet-facing application to include your Ghidra server instance! Alternatively, VPS providers typically provide console access via the VM management portal web app.
5. Once in the console, download the script. It's recommended you review the code for random stuff downloaded from the internet, to include this.
git clone https://github.com/bishoppebbles/GhidraServerScript.git
If it's not executable, make it RWX in case you want to modify the script.
chmod 700 ghidra.sh
Script Usage
As written, the script downloads the linked version of Ghidra, confirms its SHA256 hash, and creates a single user account with the default password. This is a good time to reiterate that password only authentication for internet facing services (or possibly any service) is risky. I'd highly recommend any user account password be long. Length is the single most important characteristic for passwords. Ghidra has the option to support certification authentication as well and that is highly recommended though it's not something I explored.
./ghidra.sh <ghidra_download_url> <file_sha256> <username> [<public_server_ip>]Options
- ghidra_download_url : download zip link from the Ghidra github page
- file_sha256 : download sha256 provided on the Ghidra github page
- username : Ghidra server user account name
- Default password:
changeme - You have 24 hours to change the password or Ghidra locks the account
- You can add additional users later
- public_server_ip : public IP address assigned to your VPS (optional)
Example with a user name of john and a public IP address of 11.10.9.8 (note this uses Ghidra 10.3.2)
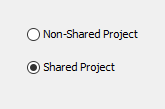
./ghidra.sh https://github.com/NationalSecurityAgency/ghidra/releases/download/Ghidra_10.3.2_build/ghidra_10.3.2_PUBLIC_20230711.zip a658677a87d0be12ab65bd7962f471875b81a2dd2ea35d69cc3201555ca1bd6f john 11.10.9.8Creating a Shared Project will automatically prompt for a Ghidra server connection.


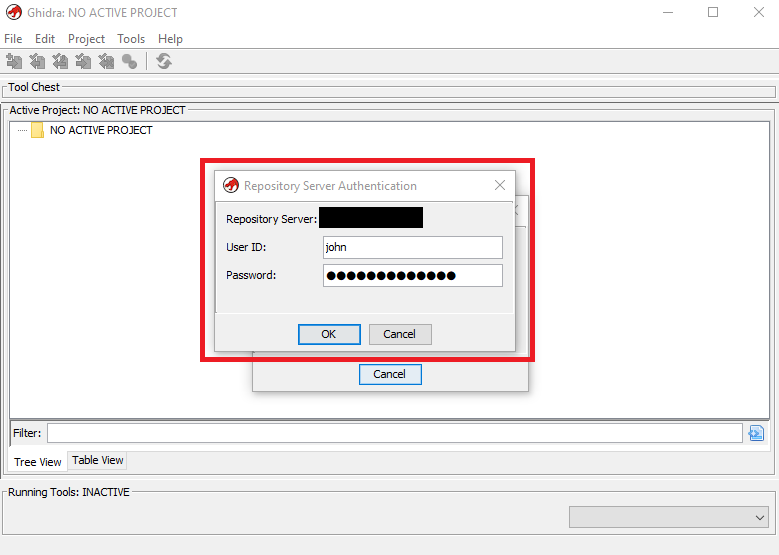
A successful Ghidra server connection will prompt for a User ID and Password.

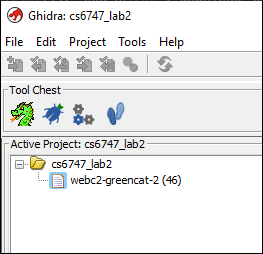
Once opened, a Shared Project looks the same as a local Non-Shared Project.

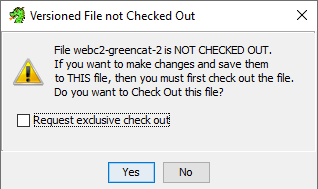
After opening a Shared Project file, if not alrady checked out, you'll be prompted to do so. You can also request exclusive access. If collaborting this is an important consideration but if you're working solo then it doesn't matter. However, if you do request exclusive access it's important to check-in the file once your down. Otherwise a collaborator won't be able to open the file for edits. This includes yourself if accessing the project on a system different than the one where you previously checked out the file.

Ghidra Server Commands of Note
These commands are installed with Ghidra and would be run on your server commandline. They can be used after the fact to manage user accounts and the server operation. My installation script adds a single user so if you want to create more post install, this is how you'd do it.
List the server users:
/opt/ghidrasrv/server/svrAdmin -users
Add a user:
/opt/ghidrasrv/server/svrAdmin -add <username>
Reset a user password:
/opt/ghidrasrv/server/svrAdmin -reset <username>
Manage the server operation:
/opt/ghidrasrv/server/ghidraSvr { start | stop | restart | status }
This was a reltively easy and fun project. It also helped me a lot with my course. We heavily used Ghidra for the first 1/3 of the course and without my cloud server I would have likely used my laptop for the whole thing. Not the end of the world but having more screen space is nice as I had several windows open for Ghidra, a debugger, web browser, and often Notepad to take notes. I also linked this project to the course discussion board and got confirmation from several folks they successfully used the script to deploy their own Ghidra server instance. I'm no bash scripting wiz but I also learned a little more about sed as well :-)